ATV Brake Service Timing Depends On Wear, Terrain, Fluid Condition, And Stopping Feel
ATV owners should handle brake system maintenance whenever lever feel changes, stopping distance grows, pads become thin, rotors are damaged, fluid is old or low, or the owner’s manual interval arrives. Mud, water, hills, towing, plowing, cargo, and frequent descents shorten the schedule. Brake timing should follow real wear, not only the calendar.
A: Follow the manual and inspect sooner after harsh riding.
A: A new feel, sound, smell, leak, heat issue, or warning light.
A: Yes. Mud adds grit, moisture, heat, and hidden wear.
A: No. Restore the baseline first, then decide if upgrades are useful.
A: Yes, especially after water, rocks, towing, heat, or heavy loads.
A: Dates, hours, parts, fluids, settings, and symptoms are all useful.
A: Use caution on safety, sealing, steering, suspension, brake, and drivetrain parts.
A: Working does not mean healthy; inspect when symptoms change.
A: Get help for uncertain brakes, steering, wiring, fuel leaks, or structural issues.
A: Inspect early, fix small problems, and test before riding remote terrain.
Use The Manual As The Baseline
Brake maintenance timing starts with the owner’s manual. The manual gives inspection intervals, fluid specifications, service limits, and procedures for the exact ATV. That baseline matters because brake designs vary by model.
The manual is not the whole answer, though. Real riding can move service earlier. Mud, water, descents, cargo, towing, and plowing all change how quickly pads, fluid, rotors, cables, and calipers need attention.
Every-Ride Brake Awareness
Before each ride, check brake feel. The lever and pedal should feel familiar, and the machine should not creep because a brake is dragging. Listen for scraping or grinding during the first slow movement. Confirm that the parking brake releases fully.
This quick check is important because brakes can change between rides. Mud can dry around parts, fluid can leak, cables can bind, and pads can wear faster than expected after one harsh outing.
Pad Wear Timing
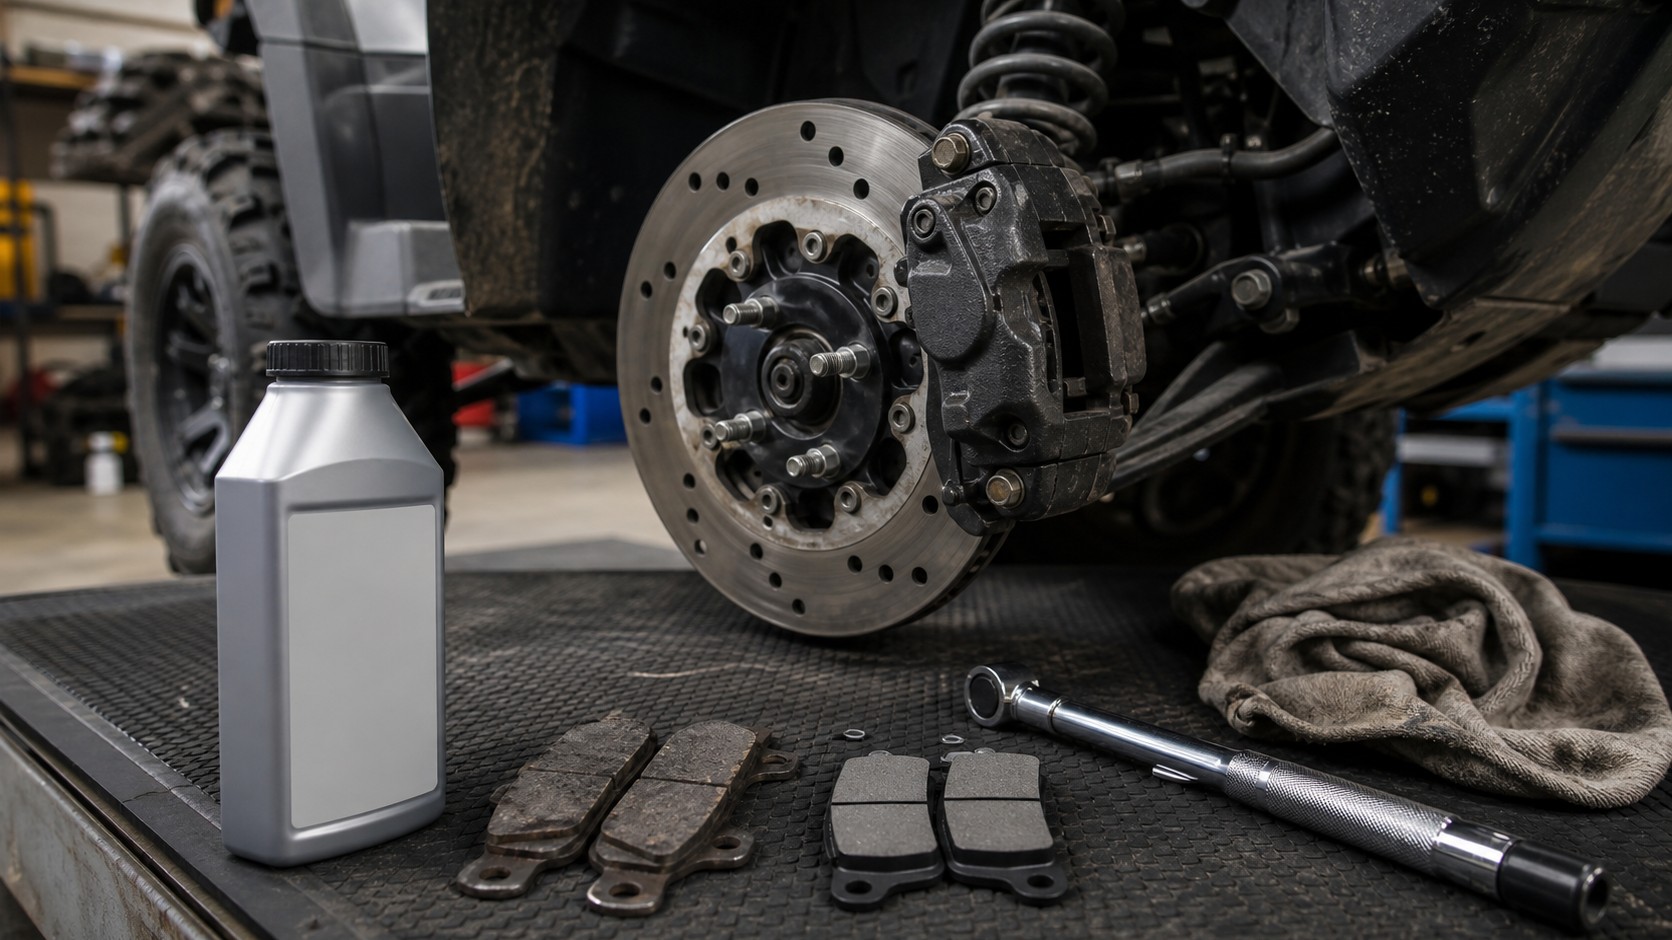
Pads should be inspected regularly and replaced before they reach the minimum thickness. Mud, sand, grit, and water can shorten pad life dramatically. A rider who uses the ATV on steep descents or with cargo may also wear pads sooner.
Do not wait for grinding. Grinding often means the pad material is gone and metal is contacting the rotor. At that point, the repair can become more expensive and stopping power may already be compromised.
Rotor And Drum Timing
Rotors and drums should be checked when pads are inspected, after impacts, and whenever braking feels pulsing, rough, weak, or noisy. Deep grooves, warping, cracks, heavy rust, or heat discoloration deserve attention.
A new pad on a damaged rotor may not perform correctly. Brake parts work together, so timing should include the surface the pad uses, not only the pad itself.
Fluid Timing
Brake fluid should be inspected and replaced or bled according to the manual. Moisture contamination, air in the system, old fluid, low level, and leaks can all change lever feel. A soft or spongy lever should move service forward immediately.
Fluid timing is especially important for ATVs that sit for long periods or see water often. Storage does not stop fluid from aging, and water-heavy use increases the need for inspection.
Calipers, Hoses, And Hardware
Calipers should slide or move as designed, and hardware should be clean enough to let pads work evenly. Hoses should not be cracked, swollen, leaking, or rubbing. Fittings should stay dry. Sticking calipers can wear pads unevenly and create heat.
Inspection timing should move earlier if one wheel smells hot, the ATV pulls during braking, or one pad wears much faster than the other. Uneven wear is a clue that the system is not working evenly.
Parking Brake Timing
Parking brakes deserve regular checks because they are easy to ignore. A parking brake that drags can overheat parts, reduce power, and wear pads or shoes. A parking brake that will not hold can create loading and parking risk.
Cable-operated systems may need adjustment or replacement as cables stretch or corrode. The parking brake should be part of the brake schedule, not an afterthought.
Harsh Use Shortens The Schedule
Mud turns into grinding paste. Water can affect feel and contaminate areas. Hills build heat. Towing and cargo increase stopping load. Plowing creates repeated low-speed brake use. These conditions all justify earlier inspection.
A single severe ride can move service forward. If the brakes were worked hard on a long descent or packed with mud all day, checking them afterward is smarter than waiting for the next monthly or seasonal interval.
Warning Signs That Mean Now
Some brake signs should not wait: soft lever, fluid leak, grinding, severe pulsing, pulling, dragging, burning smell, longer stopping distance, or a parking brake that will not release or hold. These are immediate service triggers.
If braking affects control, stop riding until the cause is understood. Brake problems are not the place to test how long a part can last.
Bottom Line
ATV owners should handle brake system maintenance on the manual schedule and sooner whenever wear, terrain, fluid condition, or stopping feel demands it. The right interval is based on real use.
Inspect often, clean after harsh rides, replace pads before damage, maintain fluid, and treat brake symptoms as safety issues. Good timing keeps stopping power predictable.
Timing By Hours, Miles, And Feel
Brake maintenance can be tracked by hours, miles, and feel. Hours help when the ATV works slowly. Miles help when it covers distance. Feel helps catch problems that appear suddenly. The best timing uses all three rather than trusting only one.
For example, a plow ATV may log few miles but use brakes often while pushing and maneuvering. A trail ATV may cover more miles but see fewer heavy loads. A mountain ATV may build brake heat on descents even if the total distance is modest.
After-Service Testing
After pads, fluid, hoses, calipers, or parking brake parts are serviced, test the system before hard use. The lever should feel firm, the ATV should stop evenly, and the wheels should release. If the lever pumps up, sinks, or feels spongy, more inspection is needed.
A short test ride close to tools is better than discovering a problem on a steep trail or while loading the ATV. Brake work should always end with confirmation.
Brake Timing For Used ATVs
A used ATV should get a brake inspection early in ownership even if it seems to stop. The new owner may not know how old the fluid is, how thin the pads are, whether the parking brake drags, or whether mud has damaged caliper movement.
This early inspection creates a baseline. Once the owner knows the brakes are healthy, future timing becomes easier because changes are easier to notice.
Final Practical Answer
So how often should ATV owners handle brake maintenance? Quickly before every ride, carefully after harsh rides, formally on the manual schedule, and immediately when symptoms appear. That layered timing is more useful than one fixed date.
Brakes are too important to maintain by hope. If stopping feel changes, the service clock has already started.
How Fast Brake Wear Can Change
Brake wear can change quickly after conditions change. A rider who normally cruises dry trails may get long pad life, then wear pads rapidly during a muddy weekend or mountain trip. Grit, water, heat, and load can turn a normal interval into an early service need.
That is why timing should respond to the last few rides, not only the last few months. The most recent harsh ride may matter more than the calendar date.
Timing By Brake Feel
Brake feel is one of the clearest timing signals. A firm, familiar lever suggests the system is behaving normally. A spongy lever may point to air, old fluid, or a hydraulic issue. A pulsing feel may point to rotor problems. A dragging feel may point to calipers, cables, or parking brake issues.
When feel changes, inspect before riding harder. The owner does not need to know the full cause immediately, but the change means the brake schedule has moved forward.
Timing By Pad And Rotor Condition
Pad thickness should be checked visually where possible and measured when needed. Rotors should be checked for grooves, warping, cracks, heat marks, and thickness limits. These checks work together because worn pads can damage rotors and damaged rotors can shorten pad life.
A pad replacement is a good time to inspect hardware, slides, caliper movement, hoses, and fluid. Brake timing should look at the whole system while access is available.
Timing By Storage
Storage does not freeze the brake clock. Fluid ages, corrosion can begin, cables can stiffen, and rodents or moisture can affect nearby parts. A machine that sat for months should have brakes checked before its first serious ride.
Before returning from storage, squeeze the lever, press the pedal, inspect for leaks, check fluid, confirm parking brake operation, and ride slowly in a safe place to confirm stopping response.
Timing By Repair History
If the brakes have been repaired recently, they should be rechecked after a short period of use. New pads, adjusted cables, serviced calipers, or bled lines may settle or reveal issues once ridden. A follow-up check confirms the work held.
This is especially important before steep trails, loaded work, or long trips. Brake work should be proven close to home before the ATV is trusted in harder conditions.
Timing For Loaded Riding
Loaded riding should move brake inspection earlier. Cargo, tools, sprayers, trailers, and plows all increase the work brakes must do, especially on slopes or repeated stops. The ATV may be moving slowly, but the braking system can still be working hard.
If a machine is switched from light recreation to work use, the brake schedule should change with it. More weight means more heat, more wear, and less margin if parts are already thin.
Timing For Hills And Descents
Steep terrain is another reason to shorten the brake schedule. Long descents can heat pads, rotors, fluid, and drums. If the rider smells heat, feels fade, or notices a softer lever after a descent, inspection should happen before the next ride.
Engine braking can help where available, but it does not remove the need for brake service. The brake system still needs healthy pads, fluid, surfaces, and adjustment.
Timing For Mud And Water
Mud and water change brake timing because they add grit, corrosion, and inconsistent feel. Mud can grind pads quickly. Water can reduce feel temporarily and may carry debris into calipers or drums. After deep mud or water, inspect sooner than usual.
Careful cleaning after these rides helps, but cleaning is not the same as inspection. Look at pad thickness, rotor surfaces, moving parts, and whether the brake releases fully.
Final Safety View
Brake service timing should be conservative because the downside of waiting is high. A weak engine may be annoying, but weak brakes can remove control. When in doubt, inspect the brakes sooner and test them in a safe place.
The correct interval is the one that keeps stopping power familiar. Once stopping feel changes, maintenance is no longer optional.
FAQ
How often should ATV owners service brakes?
Follow the owner’s manual and service sooner after mud, water, hills, towing, cargo, plowing, or any change in braking feel.
Should brake fluid be changed even if the ATV sits?
Yes, brake fluid can age and absorb moisture over time, so storage does not eliminate fluid maintenance.
Is grinding a late warning sign?
Yes. Grinding often means friction material is gone and metal may be damaging the rotor or drum.